


This tutorial will explain setting up a Plex Server on your Linux VPS, specifically on a server running Ubuntu and Debian. Notice that some of the following steps are related to VPS for Plex and should be applied on your remote server, while some configurations are for the computer (local). We will mention and divide them for you. Moreover, we will introduce the best VPS for Plex and suggests you some ways to optimize your Plex streaming. So, before delaying this any further, let’s talk Plex.
What is Plex?
Plex is a streaming media server that enables you to manage your media, including video, music, and photo collections, streaming them to your personal computer, phone, tablet, or TV at any moment and from anywhere you want. You install the Plex media server on all primary operating systems and devices. The million-dollar question now is how to install Plex Media Server on Ubuntu? Or any other operating systems for that matter.
How to install Plex on VPS: Ubuntu
Plex is proprietary software, so it is not included in the Ubuntu repositories. Of course, you can easily install Plex Server Media as it is pretty straightforward. We’ll need to enable the Plex official repository and install the package using apt. Again, this does not require you to have a specific technical background, and installing and configuring this media server will not take more than 20 minutes of your time.
Step 1: Adding Plex APT repository
The first thing you have to do is to add the Plex APT repository to your system and import the repository’s GPG key; To do so, run the following commands:
curl https://downloads.plex.tv/plex-keys/PlexSign.key | sudo apt-key add -
echo deb https://downloads.plex.tv/repo/deb public main | sudo tee /etc/apt/sources.list.d/plexmediaserver.list
Step 2: Updating and installing the server’s latest version
After you have your repository enabled, you need to update the apt package list and install the latest server version: via the following command:
sudo apt update
sudo apt install plexmediaserver
Step 3: Verifying Plex
You can check the service status to verify if the Plex is running or not via this command:
sudo systemctl status plexmediaserver
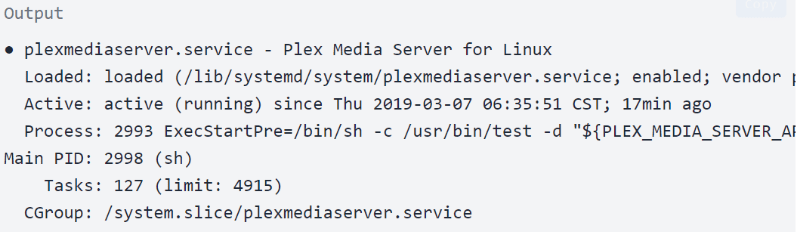
Once you run the command, you will see an output similar to this:

All done, you have Plex installed on your Ubuntu at this point. Additionally, there is something you need to do to entirely be done with installing Plex on Ubuntu, and that is adjusting your firewall.
Step 4: Adjusting your firewall rules
You already have installed Plex, and it is running on your server, but you have to ensure the server firewall’s configuration allows traffic on the Plex-specific ports. If you do not have a firewall running on your system, you can skip this part of the article.
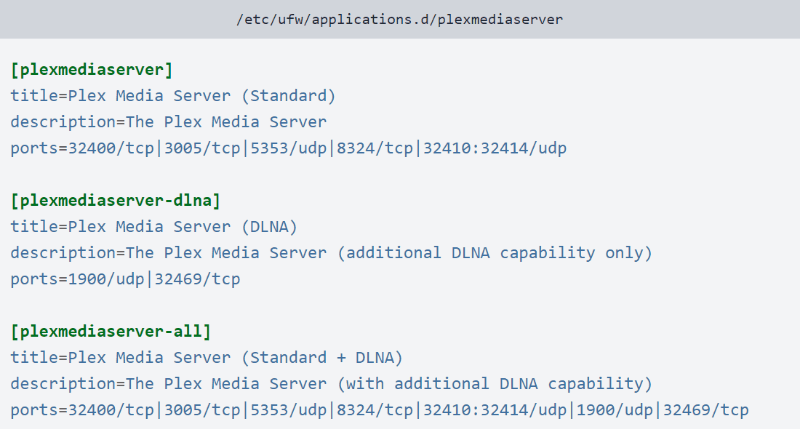
If you are utilizing UFW for managing your firewall, the most straightforward choice is to make a UFW application profile via the below command:
sudo nano /etc/ufw/applications.d/plexmediaserver
You now must save this file and update the profile list with this command:
sudo ufw app update plexmediaserver
Use this command to apply the new firewall rules:
sudo ufw allow plexmediaserver-all
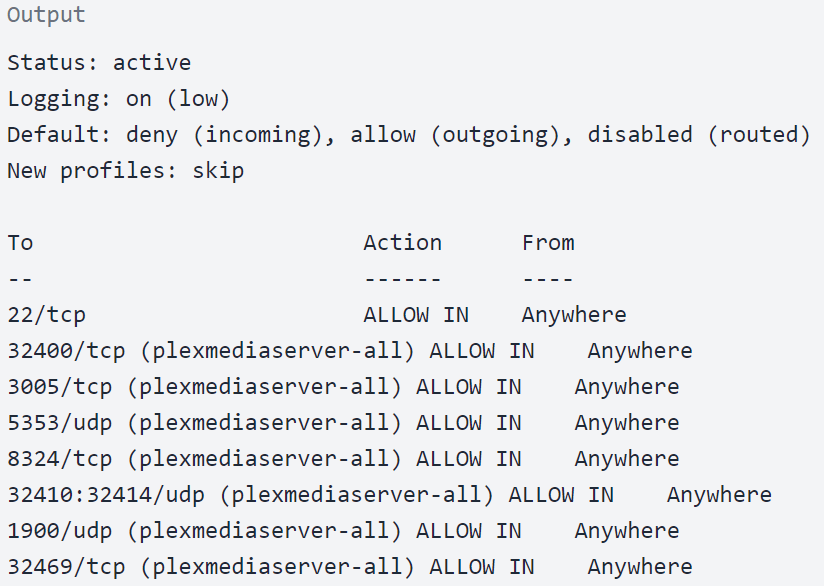
At last, you should check to see whether the firewall rules are successfully applied or not. Run the following command to do so:
sudo ufw status verbose
You should be seeing an output similar to this:
You have gone through some installation steps on your server, utilizing the best VPS for Plex of your choosing. So after installing Plex on your Ubuntu and modifying your firewall, you also need to know how to configure Plex Media Server.
Pay attention that the following steps are related to your system and not your VPS for Plex.
Step 5: Configuring Plex Server
Before going to the Plex setup wizard, you can use the following command to make the directories for storing the Plex media files:
sudo mkdir -p /opt/plexmedia/{movies,series}
The Plex operates as the user plex, and this user needs to have read and execute permissions to the media files and directories. You can use the below command to determine the proper ownership:
sudo chown -R plex: /opt/plexmedia
Note that you can select any location to store media files, ensure that you set the correct permissions.
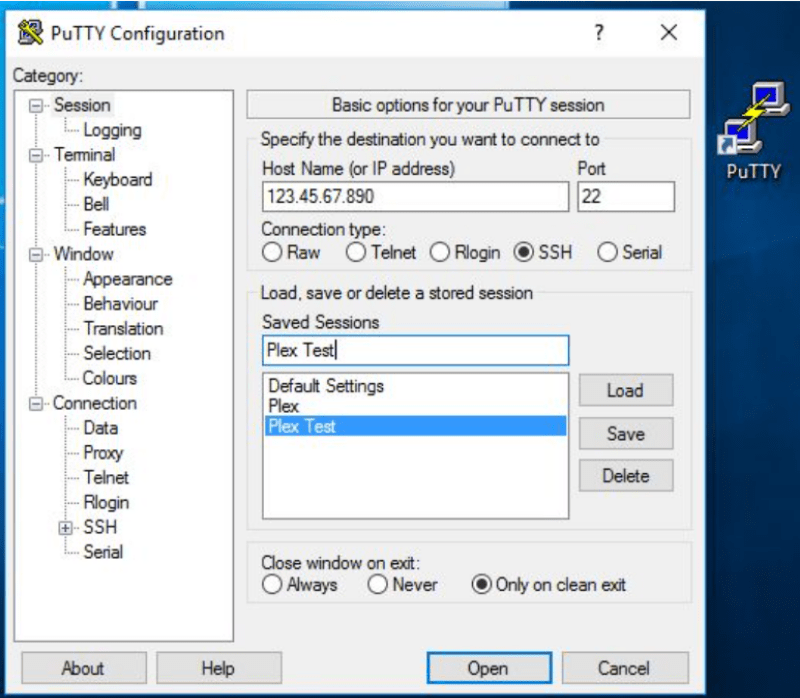
You now have to start start PuTTY in localhost mode to set up the Plex server using your local browser at this step of configuration. Open the terminal, Enter the IP address your VPS provider supplied you with.
Before clicking on Open, search for Connection on the left-hand side, choose SSH, and click on Tunnels. Type 32400 as a value for Source port and localhost:32400 for Destination fields. Now you can click on Add button.
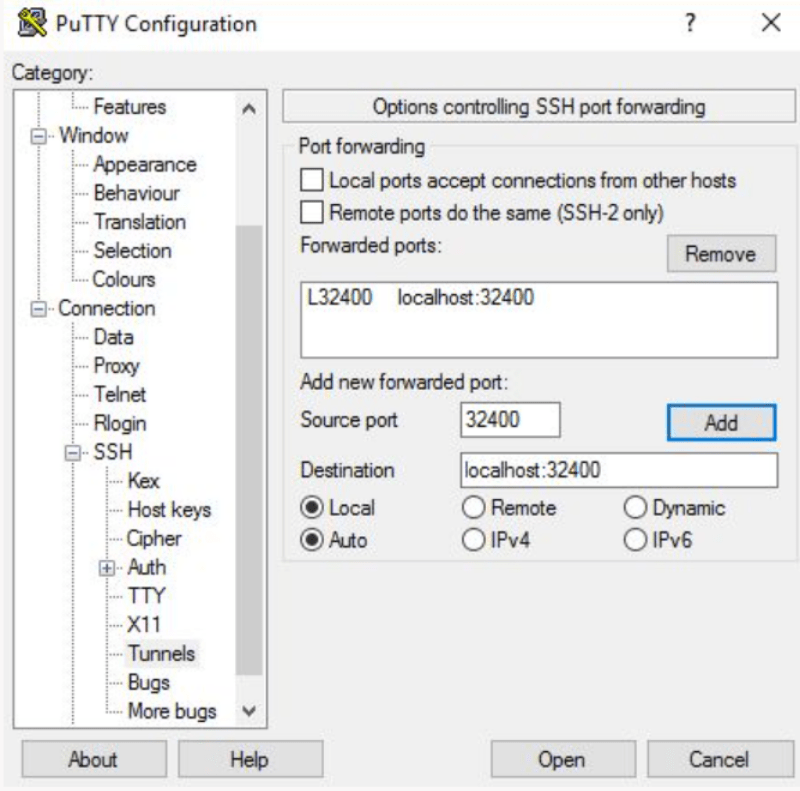
After you click on Open button, you will be logged in as your new Plexuser.
Now, let’s proceed with the Plex server configuration.
-
Open Plex website
Go to your browser, and type http://YOUR_SERVER_IP:32400/web in your address bar, redirecting you to the plex website.
-
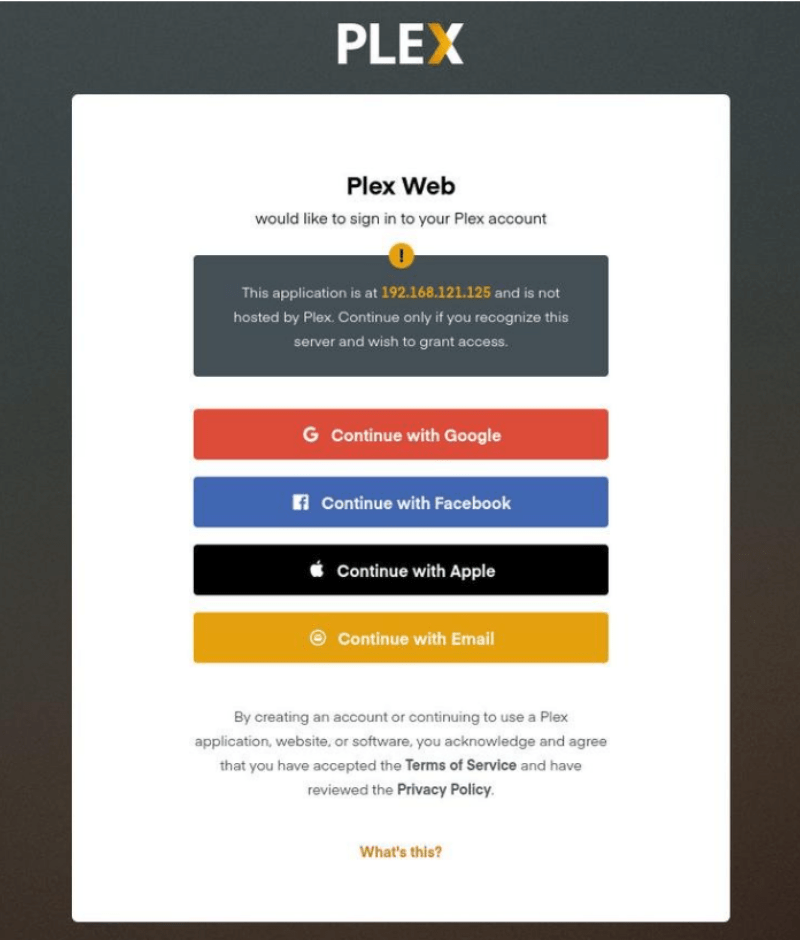
Create a Plex server account
To use Plex properly, you have to create an account. Additionally, you can click on the Google, Facebook, Apple, or Email buttons to make a free Plex account via them. If you prefer to access the premium features of Plex Server, buy a Plex Pass plan.
When you sign up, you will be redirected to the page on which you will see details about how Plex works.
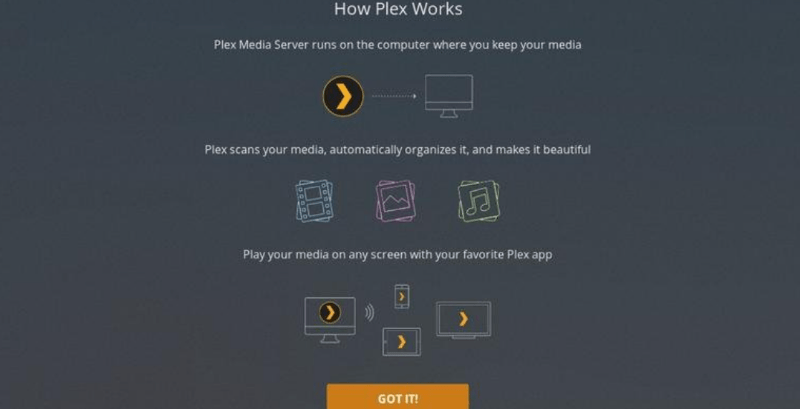
It would be best to go through these brief explanations quickly and click on the got it button.
-
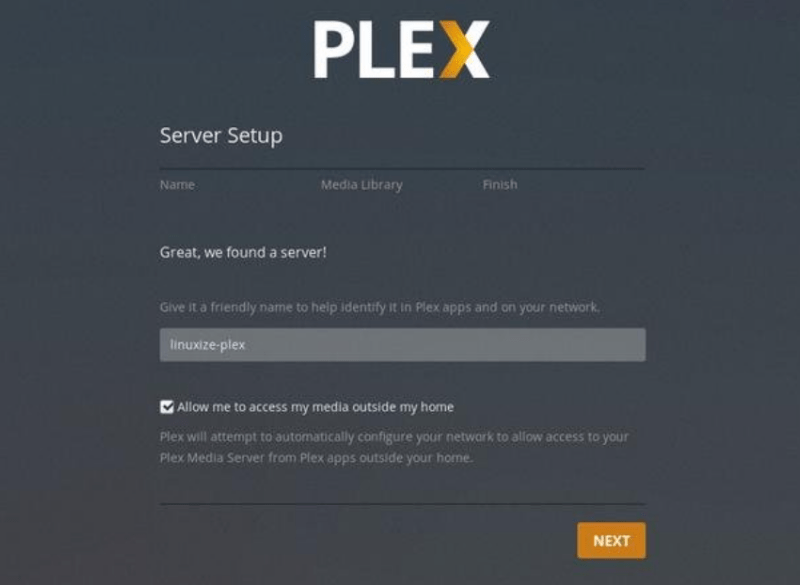
Insert Plex server name
On the next page, you need to type your Plex server name. Do not uncheck the Allow me to access my media outside my home box option, and click on the Next button.
-
Add a media library to Plex Server
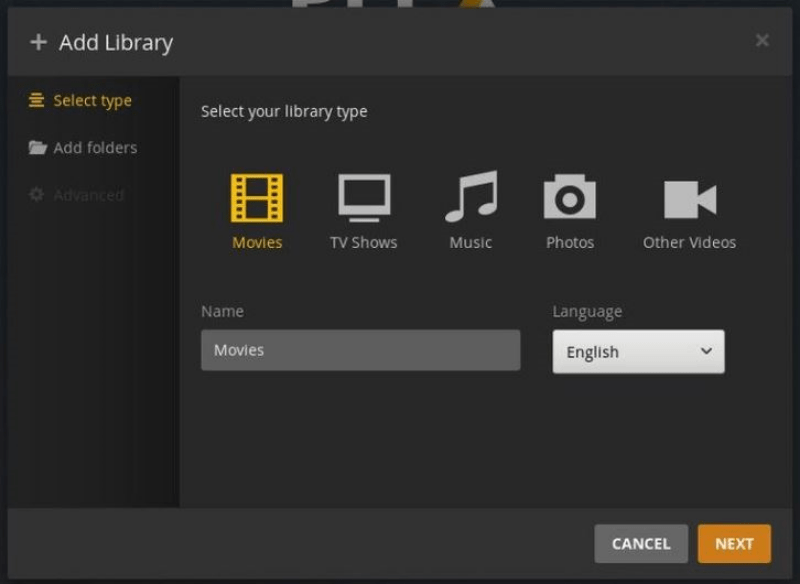
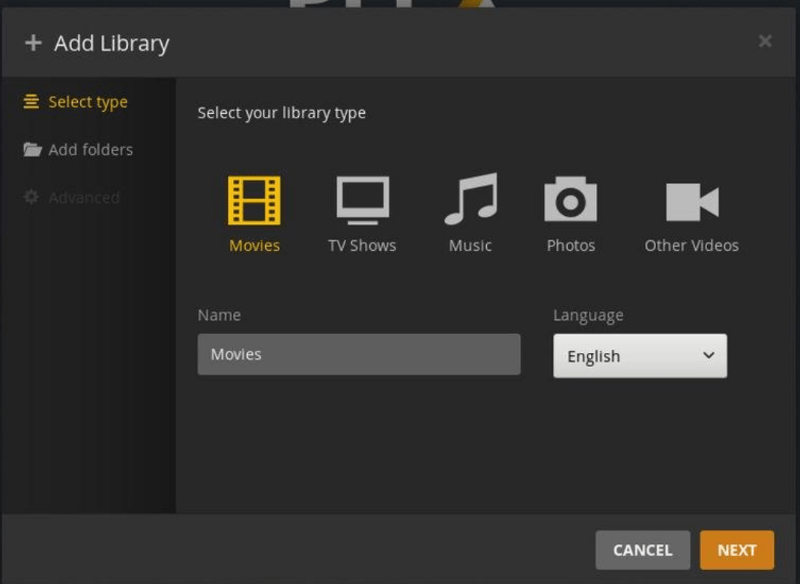
At this point, you need to add a media library; to do so, click on the Add Library button.
Once the popup windows show up o your monitor, you should choose the media type. Pick the movie as the library type and click on next.
-
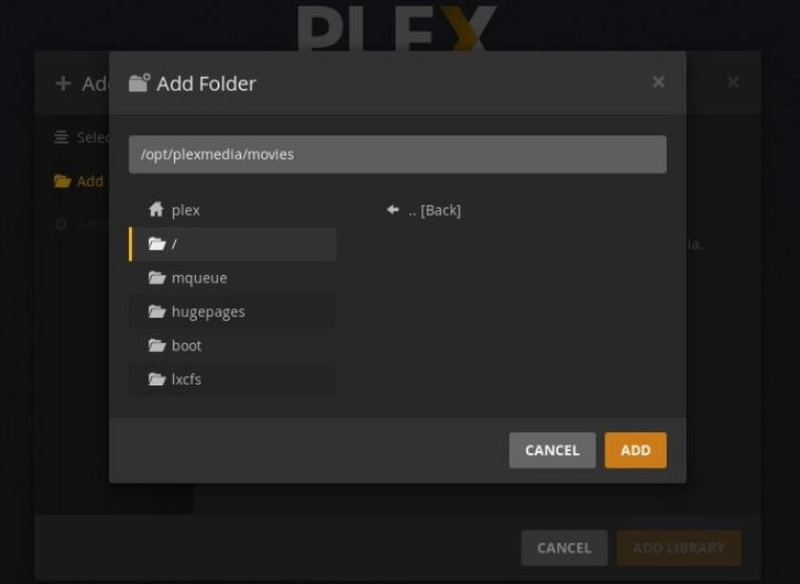
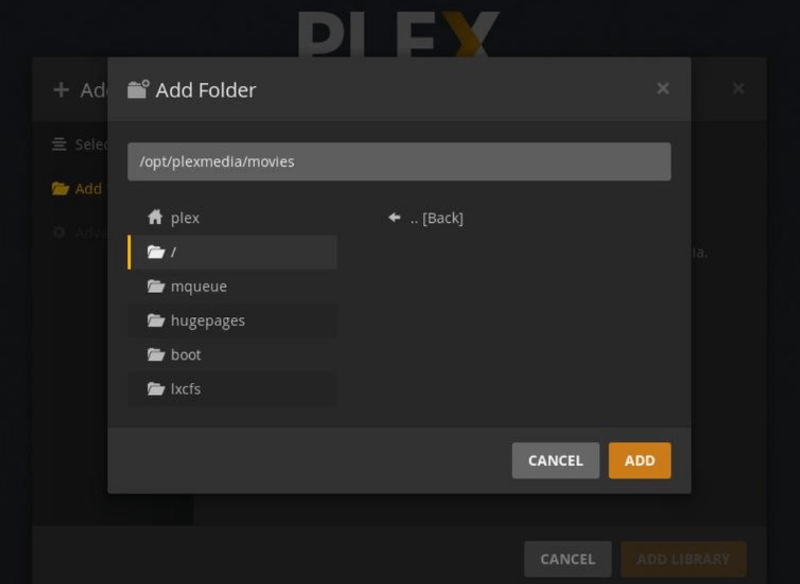
Insert the path
Now click on the browser for the media folder and then add the path to the directory which contains the Movies media files. In this Plex server guideline it is /opt/plexmedia/movies.
-
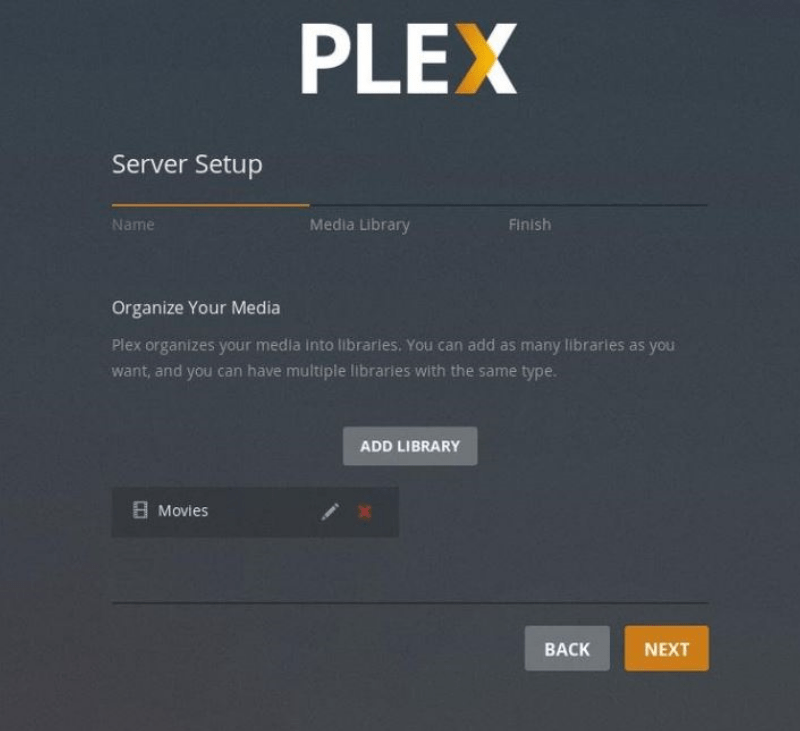
Add media to your library
Once you select the path, click on the add button and then add library. There is no limit on adding libraries for your plex server, which means you can add as many as you like. You are now all set to add media to your library.
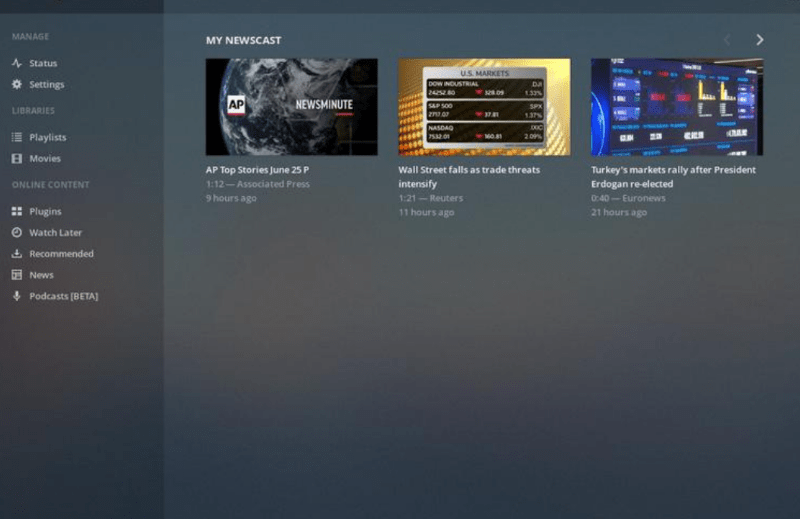
You are almost done configuring your Plex server; click on Next button, then Done. Doing so will redirect you to the Plex web dashboard.
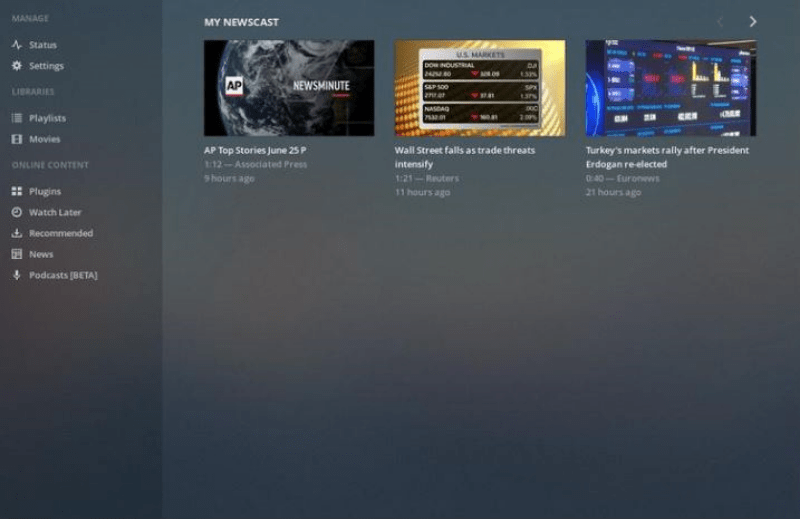
At this point, you have gone through the setup wizard. So you now can start digging Plex options and all its incredible capabilities.
As you probably gathered until now, using VPS for Plex is a convenient alternative. So let’s discuss the required steps for installing Plex on Debian, giving you an additional tutorial on PLEX VPS!
Also Read: Best CPU for Plex Server 2022
How to install Plex Media Server on VPS : Debian
Before diving into the step-by-step guideline, note that you need to log in as a user with Sudo privileges to install Plex Media Server on your Debian system.
Step 1: import the repository’s GPG key
Similar to Ubuntu, Plex Media Server is not provided in the official Debian package repository. So, we should use the Plex official repository. You can import the repository’s GPG key using the curl command like this:
sudo apt install curl
curl https://downloads.plex.tv/plex-keys/PlexSign.key | sudo apt-key add -
you need to add the Plex APT repository to your system’s software repository list via this:
echo deb https://downloads.plex.tv/repo/deb ./public main | sudo tee /etc/apt/sources.list.d/plexmediaserver.list
Step 2: install the latest version of Plex
now that the Plex repository is enabled, you need to update the apt package list and install the most recent version of the Plex Media Server using these commands:
sudo apt install apt-transport-https
sudo apt update
sudo apt install plexmediaserver
Step 3: Verifying the plex installation
Your Plex Server is now automatically running. If you want to check whether Plex is correctly installed or not and SSH service is running, use the below command to receive a print of the Plex server status as an output:
sudo systemctl status plexmediaserver
You will see an output similar to this:
Step 4: Modifying the firewall rules
Like Ubuntu, you also need to adjust your firewall rules for this operating system, meaning that it must be configured to allow traffic on Plex-specific ports. Assuming you are using UFW to manage your firewall, let’s go for the next few steps. Open your preferred text editor and create the UFW application profile:
You can save the file and update the profiles list via this command:
sudo ufw app update plexmediaserver
use the following command to apply new firewall rules:
sudo ufw allow 22sudo ufw allow plexmediaserver-all
now you need to check if the new firewall rules are applied successfully using this command:
sudo ufw status verbose
It is time to configure the Plex server on the system.
Step 5: Setting up Plex Media Server
Before we get into Plex setup, we should make the directories in which you will have will the Plex media files saved; enter the following command to do this:
sudo mkdir -p /opt/plexmedia/{movies,series}Copy
You will be running Plex Media Server runs as the user plex; note that you need to have read and execute permissions to the media files and directories. You can use this command to determine the correct ownership:
sudo chown -R plex: /opt/plexmediaCopy
Of course, just like Ubuntu, You can pick any path to store the media files.
you now need to enter http://YOUR_SERVER_IP:32400/web in your browser, which will show you sth like this:
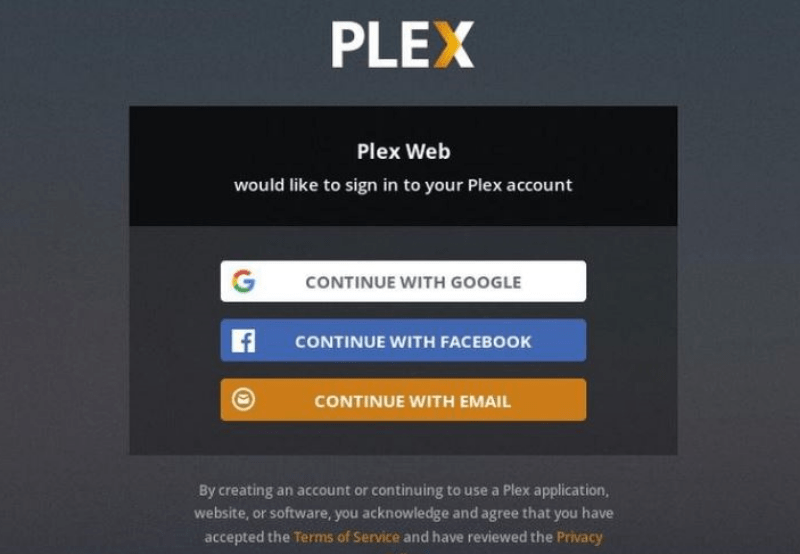
You must create an account to use the Plex Media Server. So, click on the Google, Email, or Facebook button to make a free Plex account. If you prefer to use the premium features of Plex server, buy a Plex Pass plan. After you sign up for a Plex server account, you will see a page that explains how Plex works. just like the previous Ubuntu guideline sections on VPS for Plex, you should scan through the info and click on the got it button.
You now have to type your Plex server name and click on next button. Note that you do not require to uncheck the Allow me to access my media outside my home box option.
You need to add a media library at this step by clicking on the Add Libary option. Then, choose movies as library type and click on Next button.
Now you must add the path for the directory in which you will have the Movies media files. Click on Add button and then press the Add Library button.
Like what we mentioned about Ubuntu and VPS for Plex before, you can add any number of Libraries you want here.
Finally, when you click on Next and Done, you will see the Plex server dashboard.
Additionally, You can learn more about Debian vs Ubuntu comparison to help choose the right distro for your needs. After knowing everything about configuring the Plex server for Ubuntu and Debian, you may ask yourself an important question: how do I optimize Plex streaming?
Also Read: Install PPTP VPN Server on Your VPS
How to optimize Plex streaming?
You can take some actions to have your media streaming in the best possible way with Plex Media Server. We will describe these to give you the best VPS for Plex tutorial so that it helps you use Plex smoothly and professionally.
-
Managing your Plex agents
Plex Media Server can automatically pull in metadata for your content, but you have to format your Plex media files precisely. Metadata delivers you so much more than what you know. In addition to knowing details about movies, like their posters and Episode names, it can tell you about the actors, directors, and even reviews about the content.
You have to get it right, meaning that you must configure agents correctly. IT is necessary to ensure that Local Media Assets are specified below other metadata sources. If not, Plex will use existing local metadata on the file as its source. To change these orders:
- Click on Settings > Settings > Agents.
- Then head to Movies > The Movie Database.
- Drag Local Media Assets (Movies) below The Movie Database


0 Comment