

In this article, I will show you how easily you can sign up for a Windows VPS or Linux VPS server (this includes Windows RDP which is technically the same product as a Windows VPS). The whole process takes less than one minute and you have to wait no more than 2 to 20 minutes for the VPS creation process to complete.
First, you have to choose what operating system you wish to have on your VPS server?
If you wish to choose Windows VPS – Click on the link below:
 Windows 10 VPS Hosting
Get yourself an efficient Windows 10 VPS for remote desktop, at the cheapest price out there. FREE Windows 10 running on NVMe SSD storage and high-speed internet.
Check Out Windows 10 VPS PlansIf you wish to choose Linux VPS – Click on the link below:
 Linux Hosting Simplified
Want a better way to host your websites and web apps? Developing something new? Simply don’t like Windows? That’s why we have Linux VPS.
Get your Linux VPSIn this example, I will go with a Windows VPS server, but it is basically the same procedure for a Linux VPS and it is very easy to do.
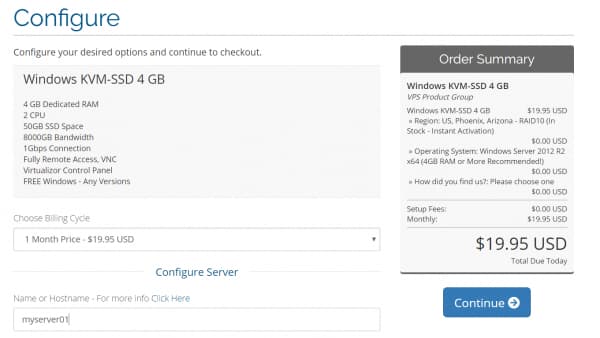
You can pick any of our available VPS plans. I suggest picking the following plan if you are new to this, or do not have high usage, but feel free to go for any higher plans to have a better experience (no lag or latency).
| 4 GB RAM | 2 CPU | 50GB SSD RAID10 | 1Gbps DDoS Protected | 8TB Bandwidth | USA, UK, Germany | $19.95/m |
However, if you are tight on budget then you can go with a smaller plan, but Windows’s process is quite heavy, so it is recommended to have at least 4GB of RAM or higher.
Place Your Order!
- Click on ‘Order Now‘ under your desired plan (if you are not sure yet that which plan is right for you, then please click here to find the best VPS that fits your needs).
- On the order page, choose your billing cycle (longer periods, like annual plans, come with considerable discounts!)
- Enter ‘myserver01‘ as below in the ‘Name or Hostname field‘.
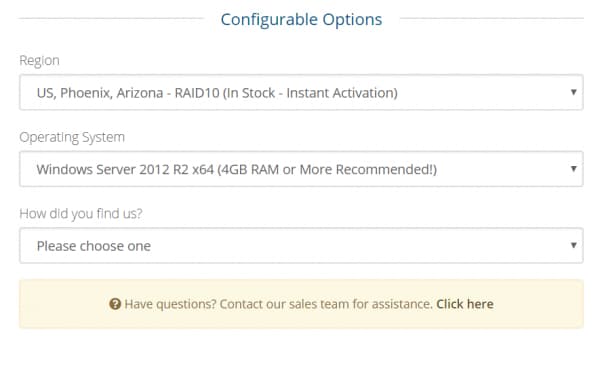
4. Now is the time to choose a ‘region‘. If you have a specific location in mind for your server, you can choose it here. There are servers available throughout the US and Canada, Europe, or Asia that you can choose from. Otherwise, leave it as default. Also, you can choose your desired Operating System here.
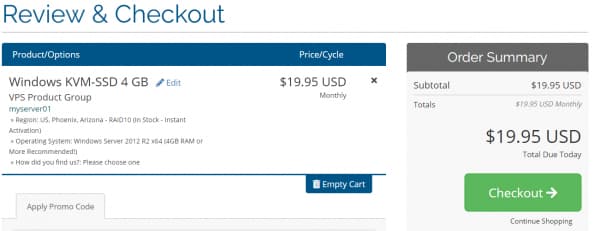
5. Click on ‘Continue‘. On the next page, confirm your order and click on ‘Checkout‘
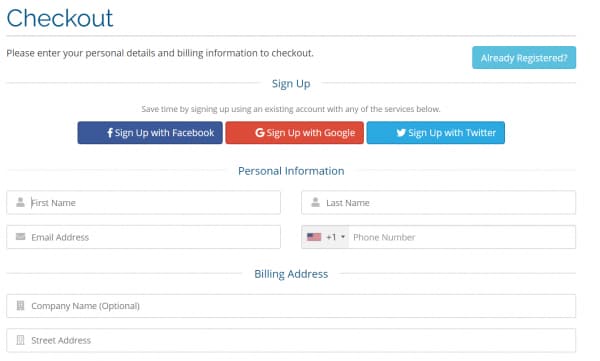
6. Now you need to enter your contact details.
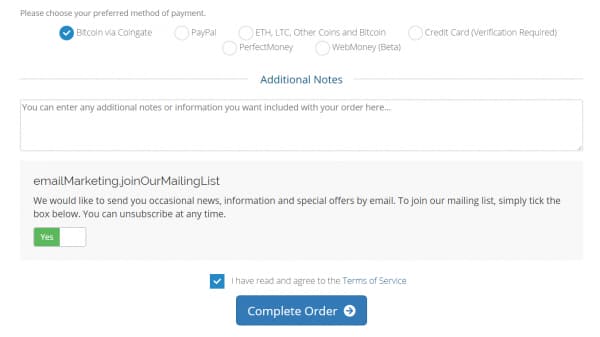
7. Scroll down and pick your desired payment method. Then check the ‘I have read and agree to the Terms of the Service box and click on ‘Complete Order‘.
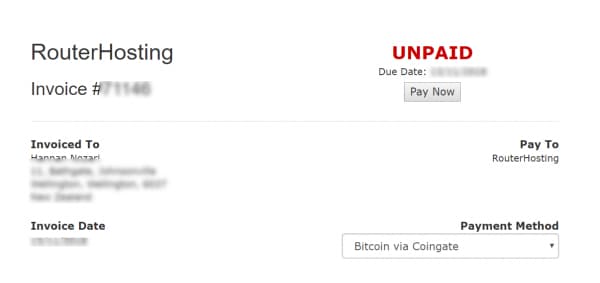
8. Pay the invoice and check your email inbox for the VPS server details and further instructions. Please also keep in mind teach server takes 2 to 20 minutes to install so please be patient ????
After installation is completed, If you forget your password for your cloudzy VPS account, you will need to reset it. This article will show you how to do that.


0 Comment